-
Array
(
[0] => Array
(
[id] => 1
[siteid] => 1
[parentid] => 0
[parentstr] => 0,
[infotype] => 0
[classname] => Home
[navname] => Home
[alias] =>
[english] =>
[linkurl] => /
[relinkurl] => index.html
[picurl] =>
[picwidth] =>
[picheight] =>
[colorval] =>
[boldval] =>
[seotitle] => Automotive Lamp suppliers,Led Headlight solutions,Luz Led Para Moto price,Headli
[keywords] => Automotive Lamp suppliers,Led Headlight solutions,
[description] => IV Auto Parts is a Automotive Lamp suppliers, provides Led Headlight solutions,Luz Led Para Moto price,Headlights For Car fittings.
[orderid] => 1
[isnav] => true
[checkinfo] => true
[url] => index.html
[child] => Array
(
)
)
[1] => Array
(
[id] => 2
[siteid] => 1
[parentid] => 0
[parentstr] => 0,
[infotype] => 0
[classname] => About Us
[navname] => About Us
[alias] =>
[english] => We Make Fence Idea
[linkurl] => about.php
[relinkurl] => about.html
[picurl] =>
[picwidth] =>
[picheight] =>
[colorval] =>
[boldval] =>
[seotitle] => Car Head Lamp Agencies,vehicle Headlamp Wholesale,car Head Lamp Price; IV Auto P
[keywords] => car head lamp agencies,vehicle headlamp wholesale,
[description] => IV Auto Parts, built in Hongkong and based in mainland China, has specialized
in developing and exporting high quality fencing system since 2009.
[orderid] => 2 [isnav] => true [checkinfo] => true [url] => about.html [child] => Array ( [0] => Array ( [id] => 10 [siteid] => 1 [parentid] => 2 [parentstr] => 0,2, [infotype] => 0 [classname] => Our Culture [navname] => Our Culture [alias] => [english] => [linkurl] => about.php?cid=10 [relinkurl] => about-10-1.html [picurl] => [picwidth] => [picheight] => [colorval] => [boldval] => [seotitle] => [keywords] => [description] => [orderid] => 10 [isnav] => true [checkinfo] => true [url] => about-10-1.html [child] => Array ( ) ) [1] => Array ( [id] => 11 [siteid] => 1 [parentid] => 2 [parentstr] => 0,2, [infotype] => 2 [classname] => Our Team [navname] => Our Team [alias] => [english] => [linkurl] => team.php [relinkurl] => team.html [picurl] => [picwidth] => [picheight] => [colorval] => [boldval] => [seotitle] => [keywords] => [description] =>
We have been supplying Replacement Headlight assembly,Side Light,Tail Lights,driving Lights,Led Fog,Interior Light,Light Accessories,since 2009, and thanks to the contribution of our professional team, customers across the world thumb up to IV Aut [orderid] => 11 [isnav] => true [checkinfo] => true [url] => team.html [child] => Array ( ) ) [2] => Array ( [id] => 12 [siteid] => 1 [parentid] => 2 [parentstr] => 0,2, [infotype] => 0 [classname] => Reference List [navname] => Reference List [alias] => [english] => [linkurl] => reference.php [relinkurl] => reference.html [picurl] => [picwidth] => [picheight] => [colorval] => [boldval] => [seotitle] => [keywords] => [description] => [orderid] => 12 [isnav] => true [checkinfo] => true [url] => reference.html [child] => Array ( ) ) ) ) [2] => Array ( [id] => 3 [siteid] => 1 [parentid] => 0 [parentstr] => 0, [infotype] => 2 [classname] => Warranty [navname] => Warranty [alias] => [english] => [linkurl] => warranty.php [relinkurl] => warranty.html [picurl] => [picwidth] => [picheight] => [colorval] => [boldval] => [seotitle] => Halogen Headlamps Solution,Motorcycle Headlamp Services,Upgrade Headlight Cost; [keywords] => Halogen Headlamps Solution,Motorcycle Headlamp Ser [description] => IV Auto Parts Provided For You Halogen Headlamps Solution,Motorcycle Headlamp Services,Upgrade Headlight Cost Calculate.
[orderid] => 3 [isnav] => true [checkinfo] => true [url] => warranty.html [child] => Array ( [0] => Array ( [id] => 13 [siteid] => 1 [parentid] => 3 [parentstr] => 0,3, [infotype] => 2 [classname] => CERTIFICATES [navname] => CERTIFICATES [alias] => [english] => [linkurl] => warranty.php?cid=13 [relinkurl] => warranty-13-1.html [picurl] => [picwidth] => [picheight] => [colorval] => [boldval] => [seotitle] => [keywords] => [description] => Your partner all the way
At IV Auto Parts we work as a complete supplier: We develop, produce and sell finishing systems and make sure the operators are fully instructed and able to run the Parts.
On top of tha [orderid] => 13 [isnav] => true [checkinfo] => true [url] => warranty-13-1.html [child] => Array ( ) ) [1] => Array ( [id] => 34 [siteid] => 1 [parentid] => 3 [parentstr] => 0,3, [infotype] => 0 [classname] => FAQ [navname] => FAQ [alias] => [english] => [linkurl] => FAQ.php [relinkurl] => FAQ.html [picurl] => [picwidth] => [picheight] => [colorval] => [boldval] => [seotitle] => [keywords] => [description] => [orderid] => 28 [isnav] => true [checkinfo] => true [url] => FAQ.html [child] => Array ( ) ) [2] => Array ( [id] => 33 [siteid] => 1 [parentid] => 3 [parentstr] => 0,3, [infotype] => 0 [classname] => Service & After Sales [navname] => Service & After Sale [alias] => [english] => [linkurl] => ServiceAndAfterSales.php [relinkurl] => ServiceAndAfterSales.html [picurl] => [picwidth] => [picheight] => [colorval] => [boldval] => [seotitle] => [keywords] => [description] => [orderid] => 29 [isnav] => true [checkinfo] => true [url] => ServiceAndAfterSales.html [child] => Array ( ) ) ) ) [3] => Array ( [id] => 4 [siteid] => 1 [parentid] => 0 [parentstr] => 0, [infotype] => 2 [classname] => Products [navname] => Products [alias] => Products List [english] => Explore Auto Parts Products [linkurl] => products.php [relinkurl] => products.html [picurl] => [picwidth] => [picheight] => [colorval] => [boldval] => [seotitle] => Headlamp Car For Sale,buy Headlamp,refit Headlight Cost, Head Lamp Fittings; IV [keywords] => IV Auto Parts Provide You With Details Refit Buy [description] => IV Auto Parts Provide You With Details Refit Buy Headlight Cost,head Lamp Fittings For Sale.
[orderid] => 4 [isnav] => true [checkinfo] => true [url] => products.html [child] => Array ( [0] => Array ( [id] => 24 [siteid] => 1 [parentid] => 4 [parentstr] => 0,4, [infotype] => 2 [classname] => Headlight assembly [navname] => Headlight assembly [alias] => Headlight assembly [english] => Headlight assembly [linkurl] => products-24-1.html [relinkurl] => products-24-1.html [picurl] => [picwidth] => [picheight] => [colorval] => [boldval] => [seotitle] => [keywords] => [description] => [orderid] => 22 [isnav] => true [checkinfo] => true [url] => products-24-1.html [child] => Array ( ) ) [1] => Array ( [id] => 29 [siteid] => 1 [parentid] => 4 [parentstr] => 0,4, [infotype] => 2 [classname] => Taillight Assembly [navname] => Taillight Assembly [alias] => Taillight Assembly [english] => Taillight Assembly [linkurl] => [relinkurl] => products-29-1.html [picurl] => [picwidth] => [picheight] => [colorval] => [boldval] => [seotitle] => Taillight Assembly [keywords] => Taillight Assembly,Tail Lights,Tail Lamp,Led Tail [description] => Taillight Assembly,Tail Lamp,Led Tail Lights For Audi [orderid] => 23 [isnav] => true [checkinfo] => true [url] => products-29-1.html [child] => Array ( ) ) [2] => Array ( [id] => 25 [siteid] => 1 [parentid] => 4 [parentstr] => 0,4, [infotype] => 2 [classname] => Turn Signal Light [navname] => Turn Signal Light [alias] => Turn Signal Light [english] => Turn Signal Light [linkurl] => products-25-1.php [relinkurl] => products-25-1.html [picurl] => [picwidth] => [picheight] => [colorval] => [boldval] => [seotitle] => [keywords] => Turn Signal Light,Side Blinker,Audi Turn Signal Li [description] => Audi Turn Signal Light [orderid] => 24 [isnav] => true [checkinfo] => true [url] => products-25-1.html [child] => Array ( ) ) [3] => Array ( [id] => 36 [siteid] => 1 [parentid] => 4 [parentstr] => 0,4, [infotype] => 2 [classname] => Alternator [navname] => Alternator [alias] => Alternator [english] => Alternator [linkurl] => products-36-1.php [relinkurl] => products-36-1.html [picurl] => [picwidth] => [picheight] => [colorval] => [boldval] => [seotitle] => Alternator For with Audi [keywords] => Alternator For with Audi [description] =>
Email:
sales@ivautoparts.com
Tel.: +86 13933893619
How To Change Audi Q7 Headlight Bulb off side?
2024-12-12
Summary:
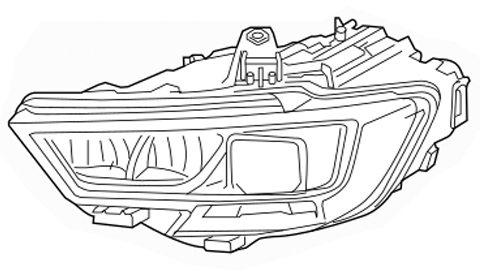
Bugs can enter headlight assemblies through small openings or gaps in the seals or around the edges of the headlights. As a vehicle ages, the rubber seals and gaskets that keep water and debris out can degrade or crack, allowing tiny insects to find their
Bugs can enter headlight assemblies through small openings or gaps in the seals or around the edges of the headlights. As a vehicle ages, the rubber seals and gaskets that keep water and debris out can degrade or crack, allowing tiny insects to find their way inside. This is more likely to happen if you frequently drive on roads with high insect activity, especially during warmer months.
Gaps and Openings: Small gaps or openings in the headlight assembly can allow bugs to enter. These gaps may be around the edges, at the back where bulbs and wiring are accessed, or through ventilation holes designed to prevent moisture buildup.
During Driving: Bugs may be attracted to the headlights, especially at night or on rural roads. They may collide with the assembly or get caught in the beam, potentially finding a way inside through any small openings.
Repair Suggestions:
Inspection: Begin by inspecting the headlight assembly for any visible gaps or openings that allow bugs to enter. Check around the edges, behind the bulbs, and around any ventilation holes.
Sealant Application: If gaps or openings are found, use a suitable sealant to close them up. Silicone sealant is often a good choice for this purpose, as it's durable and can withstand the heat and vibrations of automotive use.
Professional Cleaning:
Remove the headlight assembly from the vehicle, open it (if possible), and clean out any debris, bugs, or moisture inside. You can use compressed air to blow out the bugs or a soft brush to clear away debris.
If bugs have already entered the headlight assembly, it may require professional cleaning to remove any residue or obstructions. A professional can disassemble the headlight assembly and clean it thoroughly, ensuring that all components are functioning properly.
Replacement: In some cases, the damage caused by bugs may be too severe to repair. If this is the case, you may need to replace the entire headlight assembly.
Replace Seals and Gaskets: If you find that the seals or gaskets are damaged, replace them with new ones. This will help prevent future issues with water and bug ingress.
Use Butyl Rubber Sealant: If the headlight assembly is not fully sealed, you can use butyl rubber sealant around the edges to create a more secure seal. This will prevent further intrusion by bugs and moisture.
Reassemble and Test: After cleaning and replacing any necessary parts, reassemble the headlight and reinstall it on your vehicle. Make sure all connections are secure and test the headlights to ensure they are functioning properly.
Seal Any Remaining Gaps: To further prevent bugs from entering, you can apply a small amount of silicone sealant around the edges of the headlight assembly where it meets the vehicle's body. Be careful not to use too much, as excess sealant can create an unappealing appearance.
Upgrade to Sealed LED Assemblies: If you continue to experience problems, consider upgrading to LED assemblies with better sealing, as they’re often designed to be more robust and less prone to this kind of issue.
Check the Venting: Some headlights have ventilation ports that allow heat to escape, but these can also let in moisture or insects. If your headlight has these vents, make sure they're clear and have a proper mesh filter to keep bugs out.
Regular Maintenance: To prevent future infestations, regular maintenance of your headlights is important. Check for any signs of wear or damage that could allow bugs to enter, and address any issues promptly.
Addressing these points should help prevent bugs from getting into your headlights and can also improve their lifespan and performance.
Remember, maintaining your headlights is important for both safety and performance. If you're unsure how to proceed, consider taking your vehicle to a qualified mechanic or auto repair shop for professional assistance.


