-
Array
(
[0] => Array
(
[id] => 1
[siteid] => 1
[parentid] => 0
[parentstr] => 0,
[infotype] => 0
[classname] => Home
[navname] => Home
[alias] =>
[english] =>
[linkurl] => /
[relinkurl] => index.html
[picurl] =>
[picwidth] =>
[picheight] =>
[colorval] =>
[boldval] =>
[seotitle] => Automotive Lamp suppliers,Led Headlight solutions,Luz Led Para Moto price,Headli
[keywords] => Automotive Lamp suppliers,Led Headlight solutions,
[description] => IV Auto Parts is a Automotive Lamp suppliers, provides Led Headlight solutions,Luz Led Para Moto price,Headlights For Car fittings.
[orderid] => 1
[isnav] => true
[checkinfo] => true
[url] => index.html
[child] => Array
(
)
)
[1] => Array
(
[id] => 2
[siteid] => 1
[parentid] => 0
[parentstr] => 0,
[infotype] => 0
[classname] => About Us
[navname] => About Us
[alias] =>
[english] => We Make Fence Idea
[linkurl] => about.php
[relinkurl] => about.html
[picurl] =>
[picwidth] =>
[picheight] =>
[colorval] =>
[boldval] =>
[seotitle] => Car Head Lamp Agencies,vehicle Headlamp Wholesale,car Head Lamp Price; IV Auto P
[keywords] => car head lamp agencies,vehicle headlamp wholesale,
[description] => IV Auto Parts, built in Hongkong and based in mainland China, has specialized
in developing and exporting high quality fencing system since 2009.
[orderid] => 2 [isnav] => true [checkinfo] => true [url] => about.html [child] => Array ( [0] => Array ( [id] => 10 [siteid] => 1 [parentid] => 2 [parentstr] => 0,2, [infotype] => 0 [classname] => Our Culture [navname] => Our Culture [alias] => [english] => [linkurl] => about.php?cid=10 [relinkurl] => about-10-1.html [picurl] => [picwidth] => [picheight] => [colorval] => [boldval] => [seotitle] => [keywords] => [description] => [orderid] => 10 [isnav] => true [checkinfo] => true [url] => about-10-1.html [child] => Array ( ) ) [1] => Array ( [id] => 11 [siteid] => 1 [parentid] => 2 [parentstr] => 0,2, [infotype] => 2 [classname] => Our Team [navname] => Our Team [alias] => [english] => [linkurl] => team.php [relinkurl] => team.html [picurl] => [picwidth] => [picheight] => [colorval] => [boldval] => [seotitle] => [keywords] => [description] =>
We have been supplying Replacement Headlight assembly,Side Light,Tail Lights,driving Lights,Led Fog,Interior Light,Light Accessories,since 2009, and thanks to the contribution of our professional team, customers across the world thumb up to IV Aut [orderid] => 11 [isnav] => true [checkinfo] => true [url] => team.html [child] => Array ( ) ) [2] => Array ( [id] => 12 [siteid] => 1 [parentid] => 2 [parentstr] => 0,2, [infotype] => 0 [classname] => Reference List [navname] => Reference List [alias] => [english] => [linkurl] => reference.php [relinkurl] => reference.html [picurl] => [picwidth] => [picheight] => [colorval] => [boldval] => [seotitle] => [keywords] => [description] => [orderid] => 12 [isnav] => true [checkinfo] => true [url] => reference.html [child] => Array ( ) ) ) ) [2] => Array ( [id] => 3 [siteid] => 1 [parentid] => 0 [parentstr] => 0, [infotype] => 2 [classname] => Warranty [navname] => Warranty [alias] => [english] => [linkurl] => warranty.php [relinkurl] => warranty.html [picurl] => [picwidth] => [picheight] => [colorval] => [boldval] => [seotitle] => Halogen Headlamps Solution,Motorcycle Headlamp Services,Upgrade Headlight Cost; [keywords] => Halogen Headlamps Solution,Motorcycle Headlamp Ser [description] => IV Auto Parts Provided For You Halogen Headlamps Solution,Motorcycle Headlamp Services,Upgrade Headlight Cost Calculate.
[orderid] => 3 [isnav] => true [checkinfo] => true [url] => warranty.html [child] => Array ( [0] => Array ( [id] => 13 [siteid] => 1 [parentid] => 3 [parentstr] => 0,3, [infotype] => 2 [classname] => CERTIFICATES [navname] => CERTIFICATES [alias] => [english] => [linkurl] => warranty.php?cid=13 [relinkurl] => warranty-13-1.html [picurl] => [picwidth] => [picheight] => [colorval] => [boldval] => [seotitle] => [keywords] => [description] => Your partner all the way
At IV Auto Parts we work as a complete supplier: We develop, produce and sell finishing systems and make sure the operators are fully instructed and able to run the Parts.
On top of tha [orderid] => 13 [isnav] => true [checkinfo] => true [url] => warranty-13-1.html [child] => Array ( ) ) [1] => Array ( [id] => 34 [siteid] => 1 [parentid] => 3 [parentstr] => 0,3, [infotype] => 0 [classname] => FAQ [navname] => FAQ [alias] => [english] => [linkurl] => FAQ.php [relinkurl] => FAQ.html [picurl] => [picwidth] => [picheight] => [colorval] => [boldval] => [seotitle] => [keywords] => [description] => [orderid] => 28 [isnav] => true [checkinfo] => true [url] => FAQ.html [child] => Array ( ) ) [2] => Array ( [id] => 33 [siteid] => 1 [parentid] => 3 [parentstr] => 0,3, [infotype] => 0 [classname] => Service & After Sales [navname] => Service & After Sale [alias] => [english] => [linkurl] => ServiceAndAfterSales.php [relinkurl] => ServiceAndAfterSales.html [picurl] => [picwidth] => [picheight] => [colorval] => [boldval] => [seotitle] => [keywords] => [description] => [orderid] => 29 [isnav] => true [checkinfo] => true [url] => ServiceAndAfterSales.html [child] => Array ( ) ) ) ) [3] => Array ( [id] => 4 [siteid] => 1 [parentid] => 0 [parentstr] => 0, [infotype] => 2 [classname] => Products [navname] => Products [alias] => Products List [english] => Explore Auto Parts Products [linkurl] => products.php [relinkurl] => products.html [picurl] => [picwidth] => [picheight] => [colorval] => [boldval] => [seotitle] => Headlamp Car For Sale,buy Headlamp,refit Headlight Cost, Head Lamp Fittings; IV [keywords] => IV Auto Parts Provide You With Details Refit Buy [description] => IV Auto Parts Provide You With Details Refit Buy Headlight Cost,head Lamp Fittings For Sale.
[orderid] => 4 [isnav] => true [checkinfo] => true [url] => products.html [child] => Array ( [0] => Array ( [id] => 24 [siteid] => 1 [parentid] => 4 [parentstr] => 0,4, [infotype] => 2 [classname] => Headlight assembly [navname] => Headlight assembly [alias] => Headlight assembly [english] => Headlight assembly [linkurl] => products-24-1.html [relinkurl] => products-24-1.html [picurl] => [picwidth] => [picheight] => [colorval] => [boldval] => [seotitle] => [keywords] => [description] => [orderid] => 22 [isnav] => true [checkinfo] => true [url] => products-24-1.html [child] => Array ( ) ) [1] => Array ( [id] => 29 [siteid] => 1 [parentid] => 4 [parentstr] => 0,4, [infotype] => 2 [classname] => Taillight Assembly [navname] => Taillight Assembly [alias] => Taillight Assembly [english] => Taillight Assembly [linkurl] => [relinkurl] => products-29-1.html [picurl] => [picwidth] => [picheight] => [colorval] => [boldval] => [seotitle] => Taillight Assembly [keywords] => Taillight Assembly,Tail Lights,Tail Lamp,Led Tail [description] => Taillight Assembly,Tail Lamp,Led Tail Lights For Audi [orderid] => 23 [isnav] => true [checkinfo] => true [url] => products-29-1.html [child] => Array ( ) ) [2] => Array ( [id] => 25 [siteid] => 1 [parentid] => 4 [parentstr] => 0,4, [infotype] => 2 [classname] => Turn Signal Light [navname] => Turn Signal Light [alias] => Turn Signal Light [english] => Turn Signal Light [linkurl] => products-25-1.php [relinkurl] => products-25-1.html [picurl] => [picwidth] => [picheight] => [colorval] => [boldval] => [seotitle] => [keywords] => Turn Signal Light,Side Blinker,Audi Turn Signal Li [description] => Audi Turn Signal Light [orderid] => 24 [isnav] => true [checkinfo] => true [url] => products-25-1.html [child] => Array ( ) ) [3] => Array ( [id] => 36 [siteid] => 1 [parentid] => 4 [parentstr] => 0,4, [infotype] => 2 [classname] => Alternator [navname] => Alternator [alias] => Alternator [english] => Alternator [linkurl] => products-36-1.php [relinkurl] => products-36-1.html [picurl] => [picwidth] => [picheight] => [colorval] => [boldval] => [seotitle] => Alternator For with Audi [keywords] => Alternator For with Audi [description] =>
Email:
sales@ivautoparts.com
Tel.: +86 13933893619
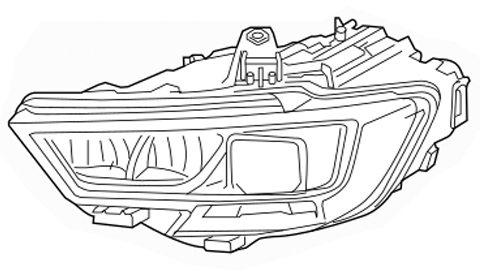
Replacing a Headlight Assembly: A Complete Guide
2023-08-20
Summary:
Learn the importance of a functioning headlight assembly and how to replace it. Find out the signs that indicate the need for replacement and get step-by-step instructions.
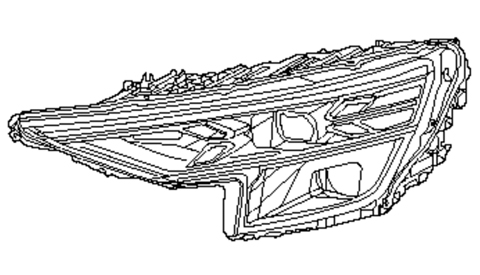
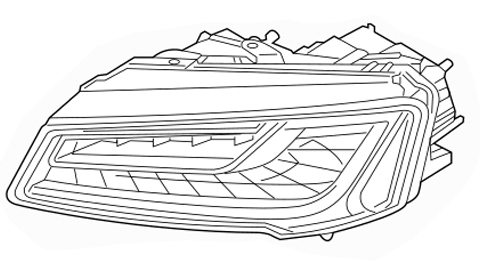
A functioning headlight assembly is crucial for the safety of both the driver and other road users. In this guide, we will explore the importance of maintaining a well-functioning headlight assembly and provide step-by-step instructions for replacing it. Whether you're a car owner or a DIY enthusiast, this informative article will help you understand the signs that indicate the need for replacement and guide you through the process. Read on to ensure your headlights are in top condition for a safer driving experience.
I. Importance of a Functioning Headlight Assembly
A. Ensuring Visibility and Safety on the Road
- A properly functioning headlight assembly provides optimal visibility, especially during nighttime driving or adverse weather conditions.
- It helps the driver see obstacles, pedestrians, and other vehicles, reducing the risk of accidents.
B. Enhanced Driving Experience
- A clear, bright headlight assembly improves the overall driving experience, allowing the driver to focus on the road without straining their eyes.
II. Signs that Indicate the Need for Replacement
A. Dim or Flickering Headlights
- Dim or flickering headlights are a clear sign that the headlight assembly needs replacement.
- This could be due to a failing bulb or a faulty electrical connection.
B. Cracked or Damaged Headlight Lens
- A cracked or damaged headlight lens not only affects the appearance of your vehicle but also compromises the functionality of the headlight assembly.
- Moisture and debris can enter the assembly, reducing the effectiveness of the headlights.
C. Moisture or Condensation Inside the Headlight Assembly
- Moisture or condensation inside the headlight assembly is a common issue that indicates a faulty seal.
- This can lead to reduced visibility and potential damage to the electrical components.
D. Non-Functional High Beams or Low Beams
- If your high beams or low beams are not functioning properly, it is likely that the headlight assembly needs to be replaced.
- This can be caused by a malfunctioning bulb or a problem with the electrical connections.
III. Step-by-Step Instructions for Replacing a Headlight Assembly
A. Gather Necessary Tools and Materials
- Before starting the replacement process, gather all the necessary tools and materials.
- These may include a socket wrench, screwdriver, new headlight assembly, and gloves for protection.
B. Locate and Access the Headlight Assembly
- Consult your vehicle's manual to locate the headlight assembly.
- In most cases, it can be accessed by opening the hood or reaching behind the front bumper.
C. Disconnect the Electrical Connections
- Carefully disconnect the electrical connections attached to the headlight assembly.
- This may involve unplugging connectors or removing screws and retaining clips.
D. Remove the Old Headlight Assembly
- Use a socket wrench or screwdriver to remove any screws or bolts securing the old headlight assembly.
- Gently pull out the assembly, taking care not to damage any surrounding components.
E. Install the New Headlight Assembly
- Align the new headlight assembly with the mounting points.
- Secure it in place by tightening the screws or bolts.
F. Reconnect the Electrical Connections
- Attach the electrical connections to the new headlight assembly.
- Ensure a secure and proper connection to avoid any electrical issues.
G. Test the New Headlight Assembly
- Once everything is properly connected, test the new headlight assembly.
- Turn on the headlights and check if both high beams and low beams are functioning correctly.
IV. Tips for Choosing the Right Headlight Assembly
A. Consider the Compatibility with Your Car Make and Model
- Ensure that the headlight assembly you choose is compatible with your specific car make and model.
- Consult your vehicle's manual or seek advice from a professional if needed.
B. Determine the Type of Headlight Assembly (Halogen, LED, HID)
- Decide on the type of headlight assembly that best suits your needs.
- Consider factors such as brightness, energy efficiency, and longevity.
C. Check for DOT and SAE Approval
- Look for headlight assemblies that have been approved by the Department of Transportation (DOT) and the Society of Automotive Engineers (SAE).
- This ensures that the assembly meets safety standards and regulations.
D. Consider the Brightness and Beam Pattern
- Evaluate the brightness and beam pattern of different headlight assemblies.
- Choose one that provides optimal visibility without causing glare for other drivers.
E. Look for Durability and Weather Resistance
- Opt for a headlight assembly that is durable and weather-resistant.
- This will ensure its longevity and performance in various weather conditions.
V. Conclusion
A. Recap the Importance of a Functioning Headlight Assembly
- A properly functioning headlight assembly is essential for visibility and safety on the road.
- It enhances the overall driving experience and reduces the risk of accidents.
B. Summary of the Steps to Replace a Headlight Assembly
- By following the step-by-step instructions provided in this guide, you can easily replace a headlight assembly and ensure its proper functionality.
C. Remind Readers to Choose the Right Headlight Assembly for Their Needs
- Consider the tips mentioned in this article when selecting a new headlight assembly.
- Choosing the right one will ensure optimal performance and longevity.
Remember, maintaining a well-functioning headlight assembly is not only crucial for your safety but also for the safety of others on the road. By following the steps outlined in this guide and considering the tips provided, you can easily replace your headlight assembly and enjoy a safer driving experience.


